
Page 58 - EE Times Europe Magazine | February 2020
P. 58
56 EE|Times EUROPE
ANALOG DESIGN
The Five Best Arduino Projects
By Nick Habby
rduino is a network for open-source electronics focused on a
technology that is easy to use. By giving a list of instructions
to the microcontroller on the board, you can tell your board
A what to do.
Arduino has been the brain behind thousands of projects over
the years, ranging from everyday objects such as battery chargers to
complex scientific devices like portable electrocardiographs (ECGs).
Arduino was founded as a convenient tool for easy prototyping at the
Interaction Design Institute Ivrea in Italy and was aimed at students
without an electronics and programming background. All Arduino
boards are completely open-source, allowing users to create them
freely and eventually improve them to suit their specific needs. The
software is also open-source and is developing worldwide through user
inputs. Arduino has been used in numerous projects and programs due
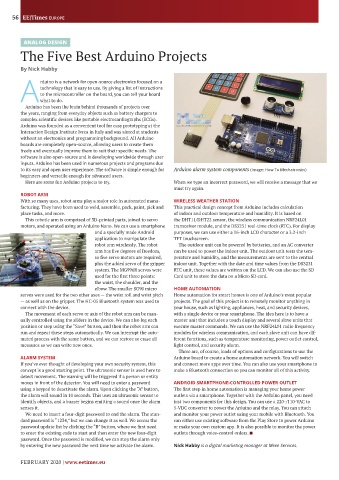
to its easy and open user experience. The software is simple enough for Arduino alarm system components (Image: How To Mechatronics)
beginners and versatile enough for advanced users.
Here are some fun Arduino projects to try. When we type an incorrect password, we will receive a message that we
must try again.
ROBOT ARM
With so many uses, robot arms play a major role in automated manu- WIRELESS WEATHER STATION
facturing. They have been used to weld, assemble, pack, paint, pick and This practical design concept from Arduino includes calculation
place tasks, and more. of indoor and outdoor temperature and humidity. It is based on
This robotic arm is comprised of D-printed parts, joined to servo the D T11 D T22 sensor, the wireless communication NRF2 L01
motors, and operated using an Arduino Nano. We can use a smartphone transceiver module, and the DS 2 1 real-time clock (RTC). For display
and a specially made Android purposes, we can use either a 16-inch LCD character or a .2-inch
application to manipulate the TFT touchscreen.
robot arm wirelessly. The robot The outdoor unit can be powered by batteries, and an AC converter
arm has five degrees of freedom, can be used to power the indoor unit. The outdoor unit tests the tem-
so five servo motors are required, perature and humidity, and the measurements are sent to the central
plus the added servo of the gripper indoor unit. Together with the date and time values from the DS 2 1
system. The MG 6R servos were RTC unit, these values are written on the LCD. We can also use the SD
used for the first three points Card unit to store the data on a Micro SD card.
the waist, the shoulder, and the
elbow. The smaller SG 0 micro HOME AUTOMATION
servos were used for the two other axes — the wrist roll and wrist pitch Home automation for smart homes is one of Arduino’s most popular
— as well as on the gripper. The C-0 Bluetooth system was used to projects. The goal of this project is to remotely monitor anything in
connect with the device. your house, such as lighting, appliances, heat, and security devices,
The movement of each servo or axis of the robot arm can be man- with a single device or your smartphone. The idea here is to have a
ually controlled using the sliders in the device. We can also log each master unit that includes a touch display and several slave units that
position or step using the “Save” button, and then the robot arm can execute master commands. We can use the NRF2 L01 radio frequency
run and repeat these steps automatically. We can interrupt the auto- modules for wireless communication, and each slave unit can have dif-
mated process with the same button, and we can restore or erase all ferent functions, such as temperature monitoring, power outlet control,
measures so we can write new ones. light control, and security alarm.
There are, of course, loads of options and configurations to use the
ALARM SYSTEM Arduino board to create a home automation network. You will switch
If you’ve ever thought of developing your own security system, this and connect more apps over time. You can also use your smartphone to
concept is a good starting point. The ultrasonic sensor is used here to make a Bluetooth connection so you can monitor all of this activity.
detect movement. The warning will be triggered if a person or entity
moves in front of the detector. You will need to enter a password ANDROID SMARTPHONE-CONTROLLED POWER OUTLET
using a keypad to deactivate the alarm. Upon clicking the “A” button, The first step in home automation is managing your home power
the alarm will sound in 10 seconds. This uses an ultrasonic sensor to outlets via a smartphone. Together with the Arduino panel, you need
identify objects, and a buzzer begins emitting a sound once the alarm just two components for this design. You can use a 220- 110- AC to
senses it. - DC converter to power the Arduino and the relay. You can attach
We need to insert a four-digit password to end the alarm. The stan- and monitor your power outlet using your mobile with Bluetooth. You
dard password is “12 ,” but we can change it as well. We access the can either use existing software from the Play Store to power Arduino
password update list by clicking the “B” button, where we first need or make your own custom app. It is also possible to monitor the power
to enter the existing code to start and then enter the new four-digit outlets through voice-control orders. ■
password. Once the password is modified, we can stop the alarm only
by entering the new password the next time we activate the alarm. Nick Habby is a digital marketing manager at Meee Services.
FEBRUARY 2020 | www.eetimes.eu